My Cart
Your Shopping Cart is currently empty. Use Quick Order or Search to quickly add items to your order!

|
Electrophoresis is a great hands-on way to teach many different concepts. Educators use it primarily to teach about the technique itself and as a way to help students conceptualize DNA. However, depending on the scenario, you can also use it to introduce lessons on many other subjects, including forensics, environmental issues, genetics, infectious diseases, and more. By focusing on some of the technique's details, you can even include small lessons on chemistry and physics.
Educators new, and not so new, to electrophoresis often share some of the same concerns or have some of the same questions regarding electrophoresis in the classroom. Many of those questions center on how to fit an electrophoresis lab into a schedule based on relatively short classroom periods. This article is mainly designed to address this concern with some tips and practical advice.
Instructors often wonder what to do with concentrated solutions of TBE that have crystallized. The 20x solution of TBE commonly found in kits is a highly concentrated solution and thus precipitates out very easily. Long-term storage (6 mo) and cooler temperatures are 2 of the most common catalysts for TBE precipitation/crystallization.
Don't throw crystallized TBE away-you can still use it! While simple heating will not bring the crystals back into solution, heating the crystallized buffer in a microwave oven will. Be sure to loosen the lid on the bottle of TBE before microwaving. You may have to let the solution boil in the microwave for a few minutes to completely dissolve the crystals.
You can avoid buffer crystallization by storing buffer as a 5x or 1x solution. However, be aware that even a 5x solution will form a small amount of precipitate if stored for a very long time
Knowing where the good stopping points are helps a great deal in figuring out how to schedule your lab. Gels can be poured 2 to 3 days ahead of time and stored submerged in buffer inside the gel box with the lid on, or in a sealed container. If you use a light-sensitive stain, such as CarolinaBLU™, and you opt to add it to the gel in addition to doing a final stain, gels can be poured no more than 24 hr ahead of time, as the stain will fade.
We don't recommend putting ethidium bromide in the gels for electrophoresis, as the stain leaks out of the gel and into the buffer during the run. Once the ethidium bromide is in the buffer it gets on the gel boxes and trays and is also easily dripped onto benchtops. Ethidium bromide is a mutagen, so contaminating gel boxes, trays, and benchtops with it is something that should be avoided.
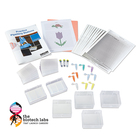
Introduce your students to the loading device they will be using and give them time to practice with it before loading and running gels. This enables students to load the gels more quickly when they actually run them. It can also save your students from making mistakes while loading expensive DNA samples. Carolina's Practice Pipetting Stations Kit is ideal for this purpose.
What type of stain you use also determines how you schedule your lab. If you use ethidium bromide, or one of the new fluorescent stains, you need to analyze or take pictures of the gels on the same day they are run. Otherwise the bands diffuse with time and you lose resolution. Large bands will lose their sharpness; small and faint bands may disappear entirely.
If you use CarolinaBLU™, you can easily examine the gels at a later time. Once gels are stained with CarolinaBLU™ the DNA bands do not readily diffuse. Store the gels in a refrigerator, in just enough distilled water to keep them hydrated. Smaller bands, such as PCR products that are only a few hundred base pairs in size, still diffuse some and should be viewed within 24 hr. However, larger bands such as those resulting from digestion of lambda DNA and plasmids retain their clarity for weeks or months if the gels are stored properly.
If you use CarolinaBLU™, factor into your scheduling that optimum visualization of the bands is not reached until 4 to 5 hr after destaining. More intense bands can often be visualized immediately after the 15 to 20 min staining step, but often the simplest thing to do is to destain the gels overnight.
Another option to help fit an electrophoresis lab into your schedule is to run the gels overnight at very low voltage (10 to 15 V). You may have to play with the timing to figure out exactly what voltage works best for your scheduling and your particular lab. How long gels take to run-especially over a long time period such as overnight-will vary depending on the particular gel box, the percentage of the gel run, and the size of the DNA fragments in the sample.
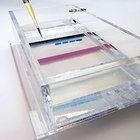
Consider Carolina’s new Fast Gels Kit for fast results. In place of the TAE or TBE buffer used in most kits, it uses a new patented buffer that allows you to run the gels at high speed without a decrease in band resolution. The kit’s gels can run in 15 to 18 min if you use a 290-V power supply. Even if you don’t have a power supply capable of that voltage, you can still gain some time by running the gels at a higher voltage than you normally do. The resulting gain of even 5 to 10 minutes can make a big difference in the classroom.
The Fast Gels lab manual includes 2 different scenarios to use. One scenario focuses on the genetic screening of children in a family to determine if they have inherited a cancer-associated mutation from their father. The other is an environmental forensics scenario in which confiscated fish are DNA fingerprinted to determine if a man has been illegally fishing in a protected area.
Any of the tips and practical advice discussed in this article can be used to help fit an electrophoresis lab into your classroom schedule. We hope you've discovered some that fit your teaching style and budget. The benefits your students will get from doing a hands-on electrophoresis lab make the planning well worth the effort.