My Cart
Your Shopping Cart is currently empty. Use Quick Order or Search to quickly add items to your order!
By Steve Binkley
Manager, Live Materials Product Development

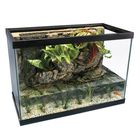
Often the most important changes in an aquatic environment are chemical changes. A River Tank is a good model system for students to investigate changes in water chemistry. First, using the tank eliminates the need for parent/guardian permission and problems associated with a field trip to a stream. Second, the tank makes it easy to manipulate factors that alter water chemistry. All you need are a River Tank ecosystem, gravel, plants, animals, and test kits or meters (probes) to detect chemical changes in the water. Among the parameters you might want students to test are pH; water hardness; and levels of ammonia, nitrite, and nitrates.
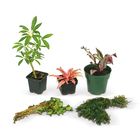
Set up your River Tank with substrate (gravel, either quartz only or with some limestone mixed in) and dechlorinated water. (To view a video on how to set up a River Tank, go to Carolina.com/video.) Turn on the pump and let it run for 1 or 2 min. Add more water if needed, but do not add plants or animals at this time. After the River Tank runs overnight, direct students to make and record their initial readings to serve as the baseline. After that, add the plants. Students can take readings twice a week if using water test kits, or daily or as often as desired if using meters.
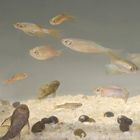
Two weeks after you plant the River Tank, add animals and have students continue to take readings. Students should note possible correlations between adding plants and animals and changes in water chemistry. They also should note the addition of food, replacement of water lost by evaporation, and other changes in the River Tank community, looking for related changes in water quality. Using books and other resources, students can offer possible explanations for their observations.