We use cookies to provide you with a great user experience. By using our site, you accept our use of cookies. You can review our cookie and privacy policy here.
  • Service & Support

    Contact Us

    Our Customer Service team is available from 8am to 6:00pm, ET, Monday through Friday. Live chat is available from 8am to 5:30pm ET, Monday-Friday.

    Call:
    800.334.5551
    Fax:
    800.222.7112
    Email:
    Email Customer Service
    Chat:
    Live Chat
     

    International Sales & Service

    We serve educators in more than 170 countries worldwide. Create a quote request on our website or contact our International Sales Team.

    International Ordering
  • Shopping
    Lists

    Login or register now to maximize your savings and access profile information, order history, tracking, shopping lists, and more.

  • Quick
    Order
  • My Cart
    0

    My Cart

    Your Shopping Cart is currently empty. Use Quick Order or Search to quickly add items to your order!

Creative Uses for Video Cameras in the Classroom

By Heather Ferguson
Product Developer

FlexCam

The hand-held video camera is an easy-to-use, engaging classroom tool. Video cameras are now readily available and affordable and are very much at home in 21st-century classrooms. Videos, particularly homemade videos, appeal to today’s learners. For teachers considering ways to incorporate video into learning, here is a list of ideas to get you started.

  1. Film students’ oral presentations. Not only does the material provide examples of the assignment for your future classes, but it also gives your students the means to improve their public speaking skills. Allow students to record themselves practicing their presentations. Then, have them review their final presentations.
  2. If you maintain a class Web site, consider recording your classroom lessons and posting them onto your site. Not only will this help inform absent students, but the entire class can refer to these videos as a refresher.
  3. To add some excitement to your field trips, consider implementing an idea used by Judy Jones, a biology teacher at East Chapel Hill [NC] High School. Judy divides her students into groups and lends each group a video camera to use during their annual trip to the North Carolina Zoological Park. Before the trip, she instructs students on the cameras’ use. The class enjoys not only the use of the cameras but also the freedom of the assignment—to record animal behavior. You can see some of the class’s video clips here.
  4. Encourage your students to use video cameras to film their independent or group science projects. If you feel comfortable lending your students a video camera, allow them to film the presentations outside class. Your students will surprise you with the array of creative and entertaining advertisements, documentaries, and movies they produce.
  5. With challenging laboratories, record a demonstration of the correct way to perform a procedure. Show students the video before they begin the laboratory exercise to help alleviate some of the frustration, waste, and time constraints associated with difficult labs. Click here to see how to load a gel for electrophoresis.
  6. Your students will enjoy using a video camera during laboratories to record their observations of chemical and physical changes (e.g., flame test chemistry) or of living organisms (e.g., bessbugs).
  7. The time-lapse setting on some video cameras allows you to capture footage of long processes that students might otherwise be unable to observe, such as the germination and growth of Wisconsin Fast Plants® and the emergence of an adult painted lady butterfly from a chrysalis. First, mount the video camera on a tripod or otherwise stabilize it so that it does not move during the filming period. Experiment with the time-lapse settings to determine the desired interval between frames. Longer intervals work with subjects that do not change quickly, such as growing plants. Consult your camera’s manual for instruction on use of time lapse. Click here to see the time-lapse reaction of silver nitrate with sodium chloride, taken with a FlexCam® microvideo camera. You might also record video in real time and later make it slow-motion, for example, to slow and analyze the sequence of movements in the locomotion of a fish or bird or the movement of mouthparts in a feeding crayfish.
  8. Collaborate with other schools by sharing videos from your classroom or lab. Your students then have the opportunity to see other classrooms, communicate with students at distant campuses, and compare the results of experiments.
  9. Pique your students’ interest in science by having them contact and record interviews with various science professionals. Scientists are often happy to answer questions, give tours, and share advice and insight with students. Be sure that a parent or other responsible adult accompanies the students to such interviews. Parents may even help film students’ interviews of scientists. Share the videos with the class, and discuss the diversity of science professions. A few examples of professionals that can be included in this project are meteorologist, chemist, physicist, physician, dentist, researcher, professor, teacher, veterinarian, and botanist.

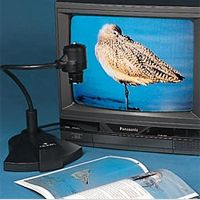
If you are interested in purchasing a classroom set of video cameras, consider the FlexCam® offered by Carolina.

As you and your students continue to work with video cameras, you will find many creative ways to enhance instruction.

Loading...